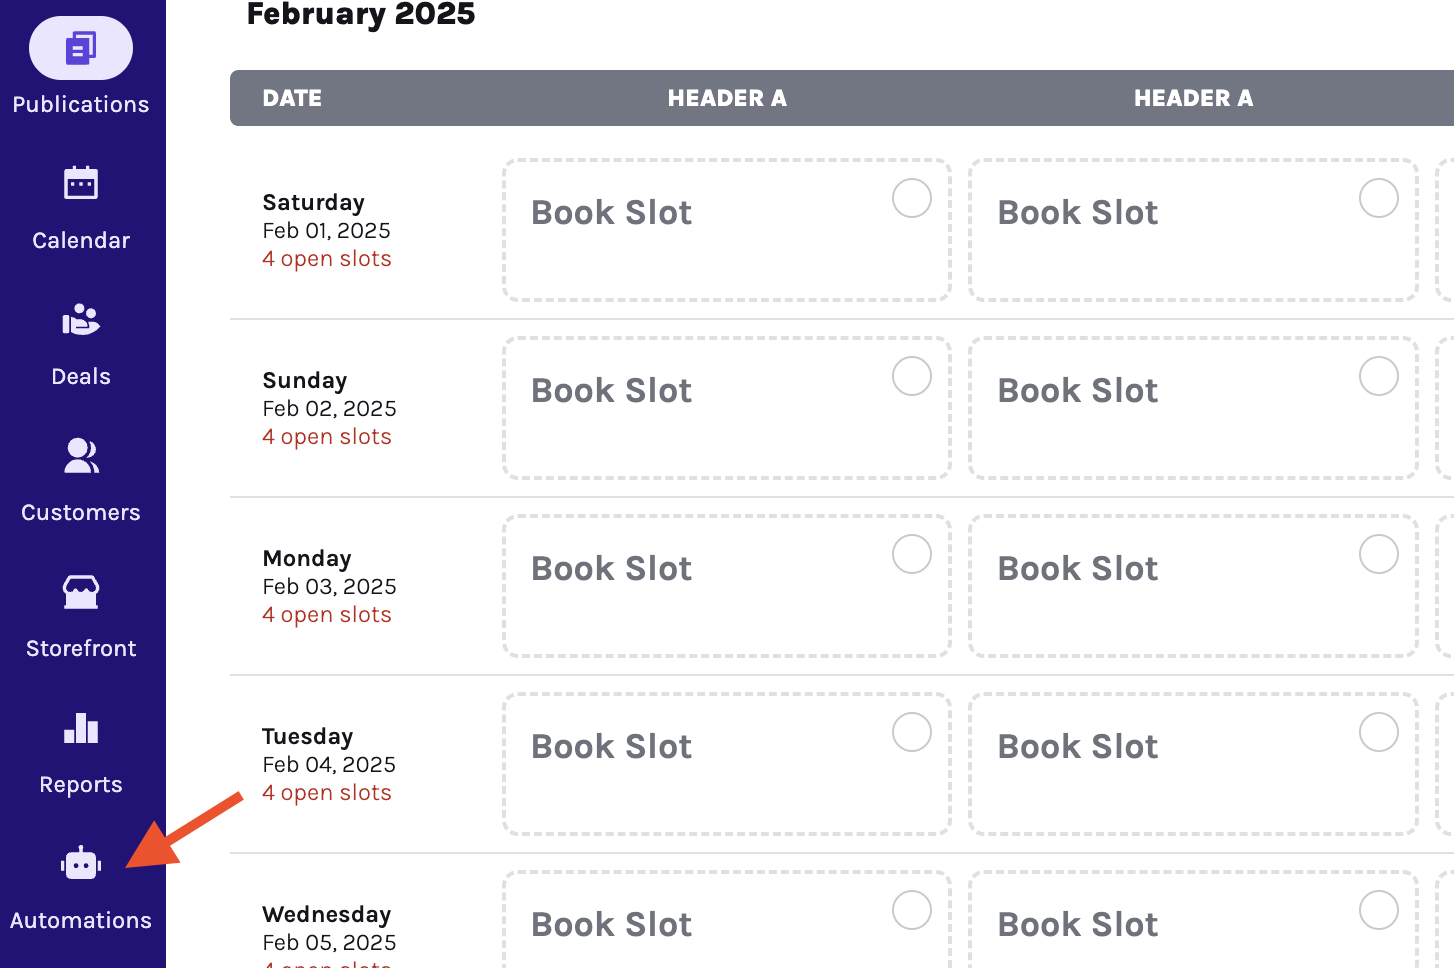
Automations
Automations in Sponsy are designed to streamline your workflow by handling repetitive tasks automatically. They save time, reduce errors, and ensure consistency.
The Automations module belongs to ourScaleplan or higher.
Automations in Sponsy are designed to streamline your workflow by handling repetitive tasks automatically. They save time, reduce errors, and ensure consistency.
With two types of automations—reactive and temporal—this feature adapts to your needs, from immediate triggers to time-based actions.
Ready to simplify your day-to-day tasks? Let’s dive into how automations work and how you can take advantage of their potential.
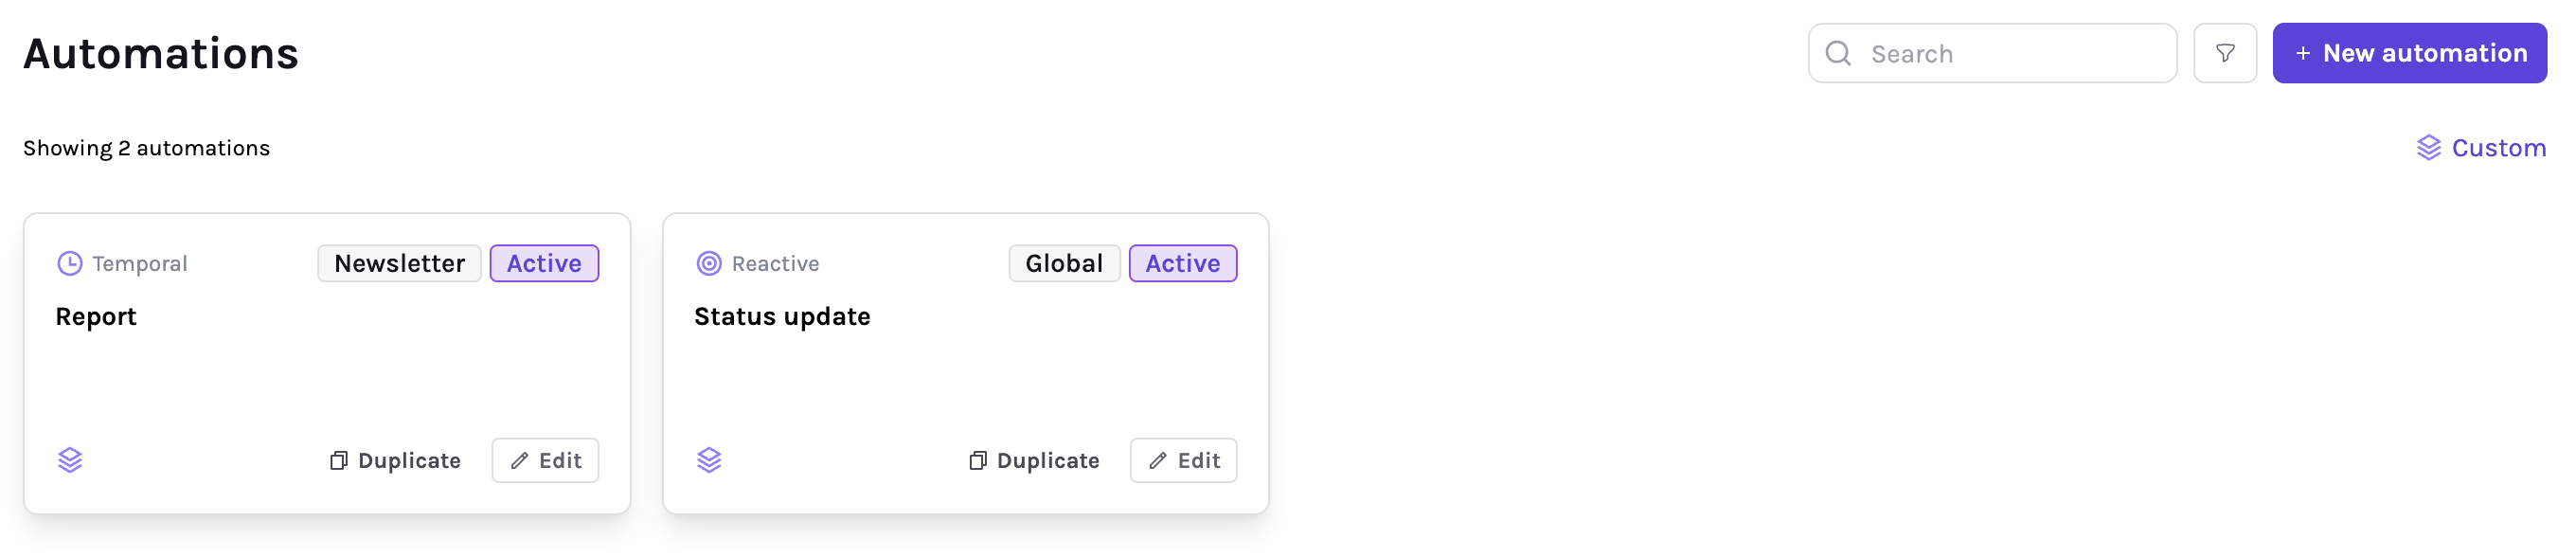
At the top, you’ll find:
- Search field: Locate specific automations by name.
- Filter button: Open a panel to filter automations by publication or type.
- New Automation button: Start creating a new automation.
Below, all created automations are displayed as cards. Each one includes the Duplicate and Edit buttons.
Types of Automations
Reactive Automations
Reactive automations are triggered by specific actions within Sponsy. For example:
- An advertiser approves content in the customer portal.
- A slot status changes to
Ready to be sent
Temporal Automations
Temporal automations are time-based. They execute actions relative to dates, such as slot dates or due dates.
Suppose your campaign assets are due a week before launch. A temporal automation can:
- Send a reminder email to the advertiser seven days prior.
- Notify your team if assets are still missing.
Creating a New Automation
- Click the
New automationbutton. - A panel opens, prompting for the automation’s name. Enter a descriptive name and click Confirm.
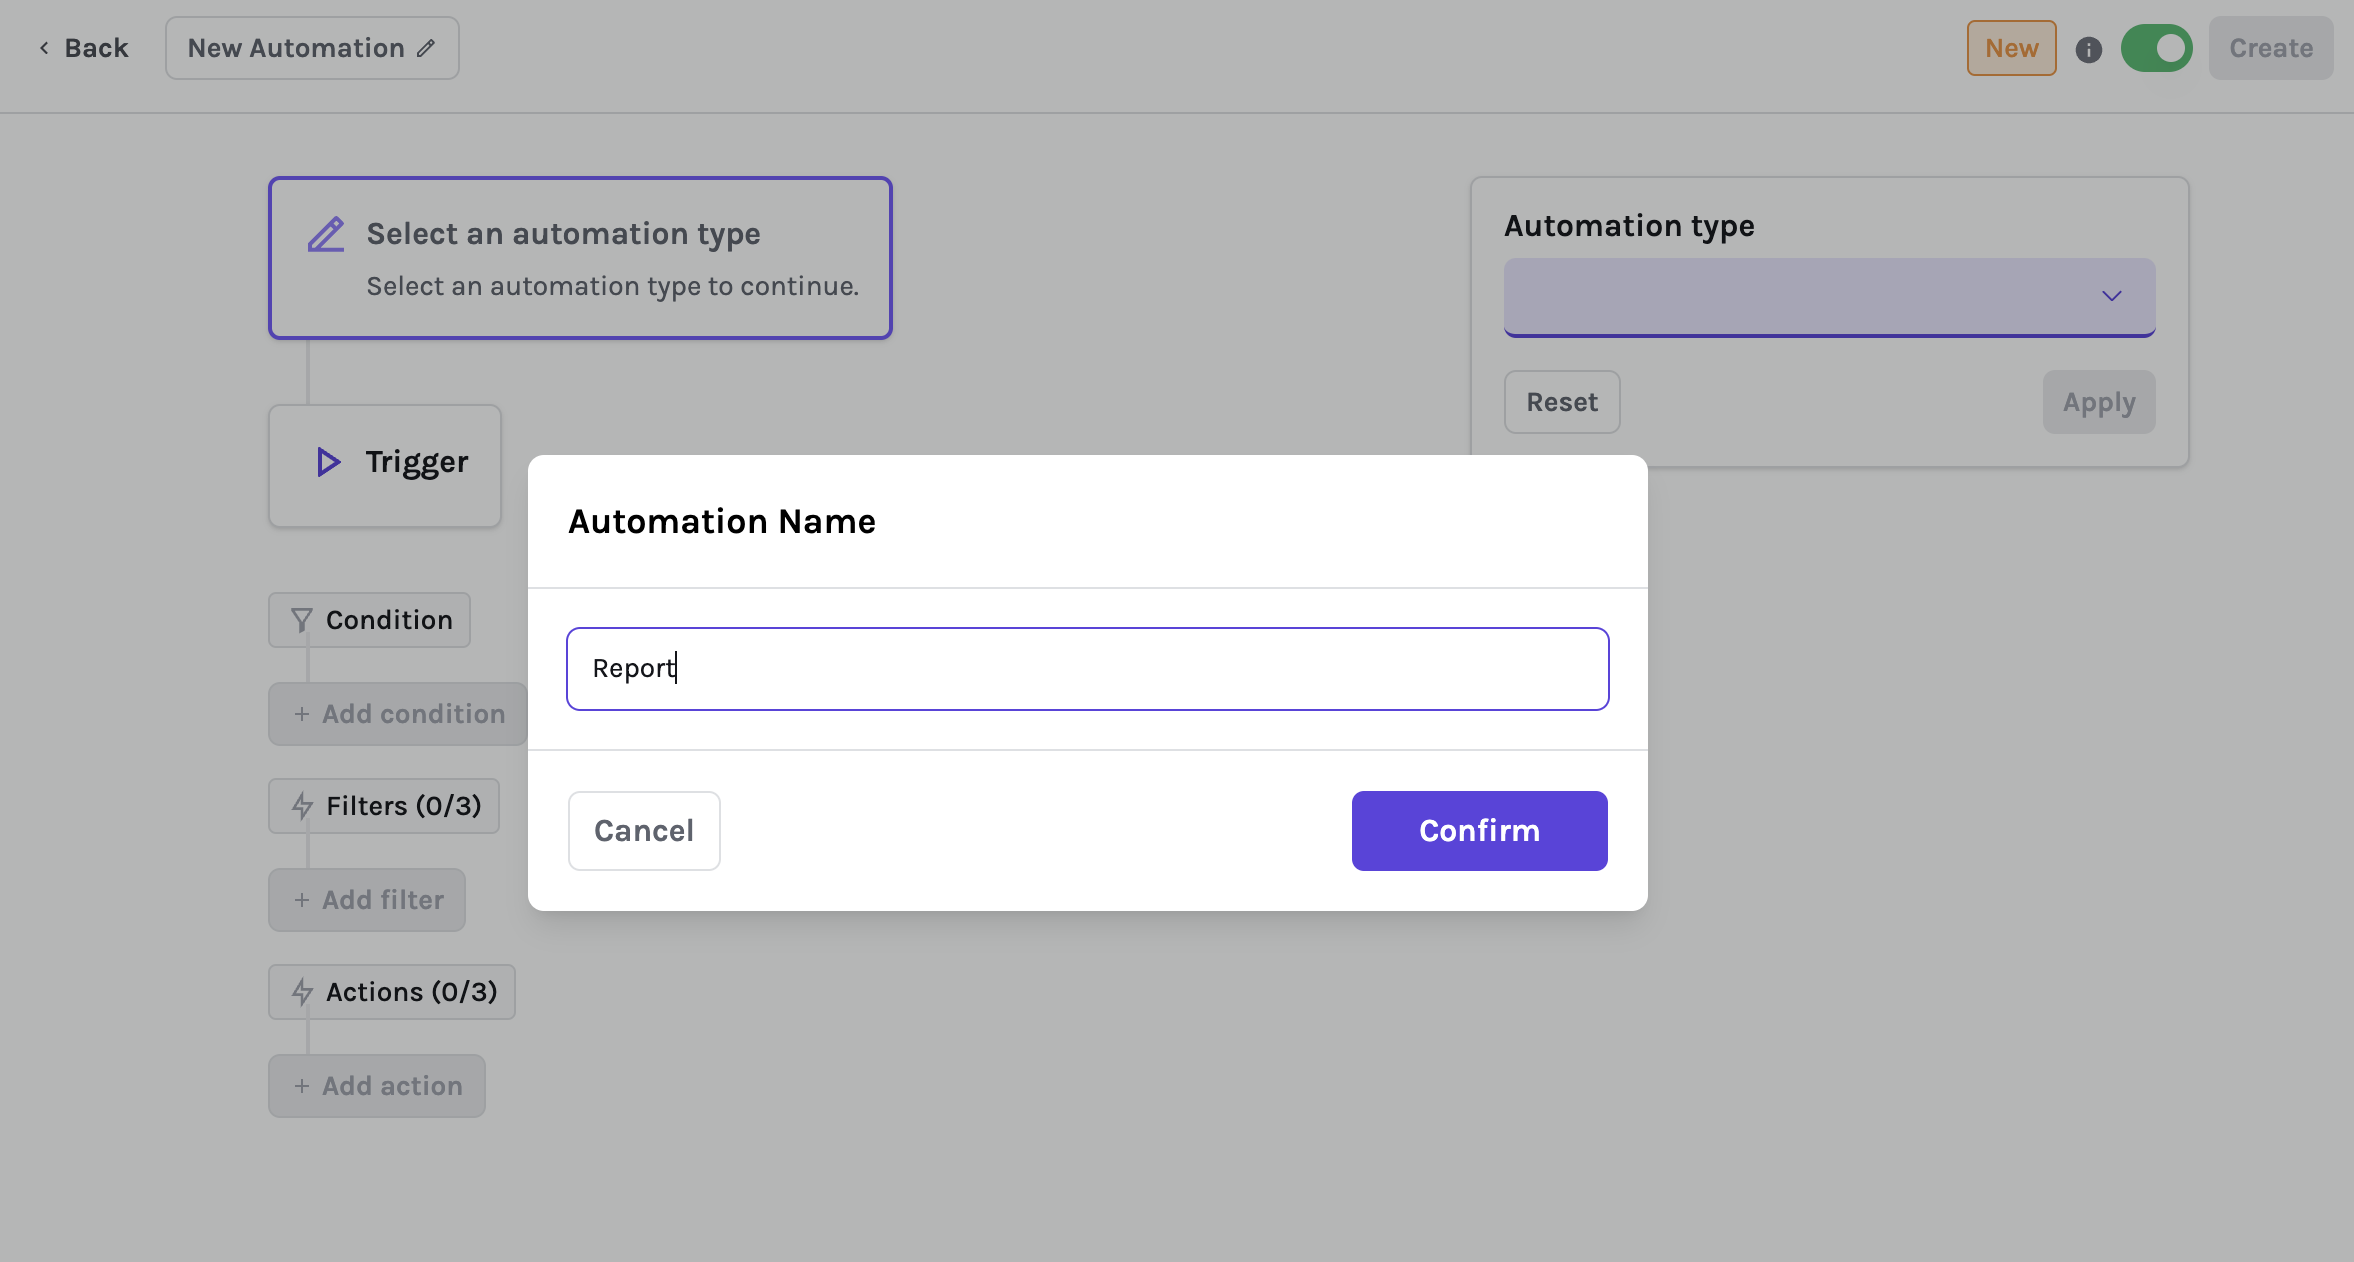
- Choose an automation type: Temporal or Reactive

- Define the trigger. A trigger defines the event or timing that can start the automation.
- If the automation type is Temporal, choose whether it runs before or after a date such as the slot date, due date, or slot end date.
- If the automation type is Reactive, choose the event that should start it, such as slot updated, status changed, assignee changed, content approved, or extra assets received.
- Add optional conditions. Conditions use
andlogic, so all selected conditions must be true for the automation to run. - Add actions. Actions define what happens after the trigger and conditions match.
Common conditions include:
- Status is or is not a specific status.
- Placement is one of several placements, or is not one of several excluded placements.
- Assignee is or is not a specific teammate.
- Customer is set or customer is blank.
- Deal external ID is set, blank, or matches a value.
- Custom fields match the values you choose.
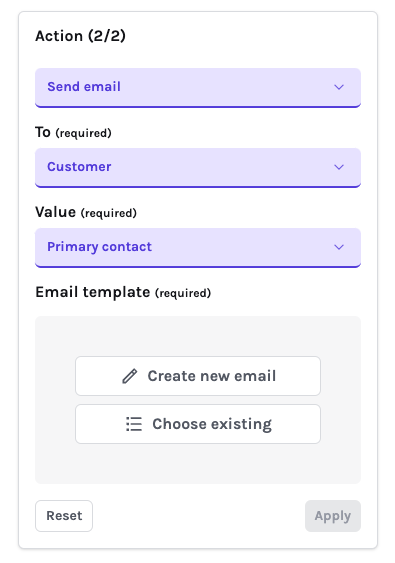
Common actions include:
Send email- Send a customized email using a template.Send Slack message- Send a message to a Slack channel or recipient when Slack is connected.Update- Update the slot’sStatusor change theAssigneeto a new team member.Delete slot- Remove the slot entirely. Use this carefully, because matching slots are deleted.Delete deal slot- Remove a slot from the related deal workflow when the automation criteria are met.Approve & lock slot- Approve the slot and lock it, preventing advertisers from editing it in the customer portal.Sync slot with ESP- Fetch performance metrics for the slot from the connected ESP.
Order of Actions
Actions are executed in the order they are listed, allowing you to chain multiple steps. For example, you can:
Sync slot with ESPto retrieve metrics.Send emailto theCustomerwith a report of the metrics.Updatethe slot’sStatusto something likeReport Sent.
Email templates
If you select the Send email action, you will be prompted to Create new email or choose an existing template.
Creating an email template
To create an email template, start by entering a template name and a subject.
In the Content tab, write the email content. Make use of the several available variables on the right, which allow you to include dynamic data.
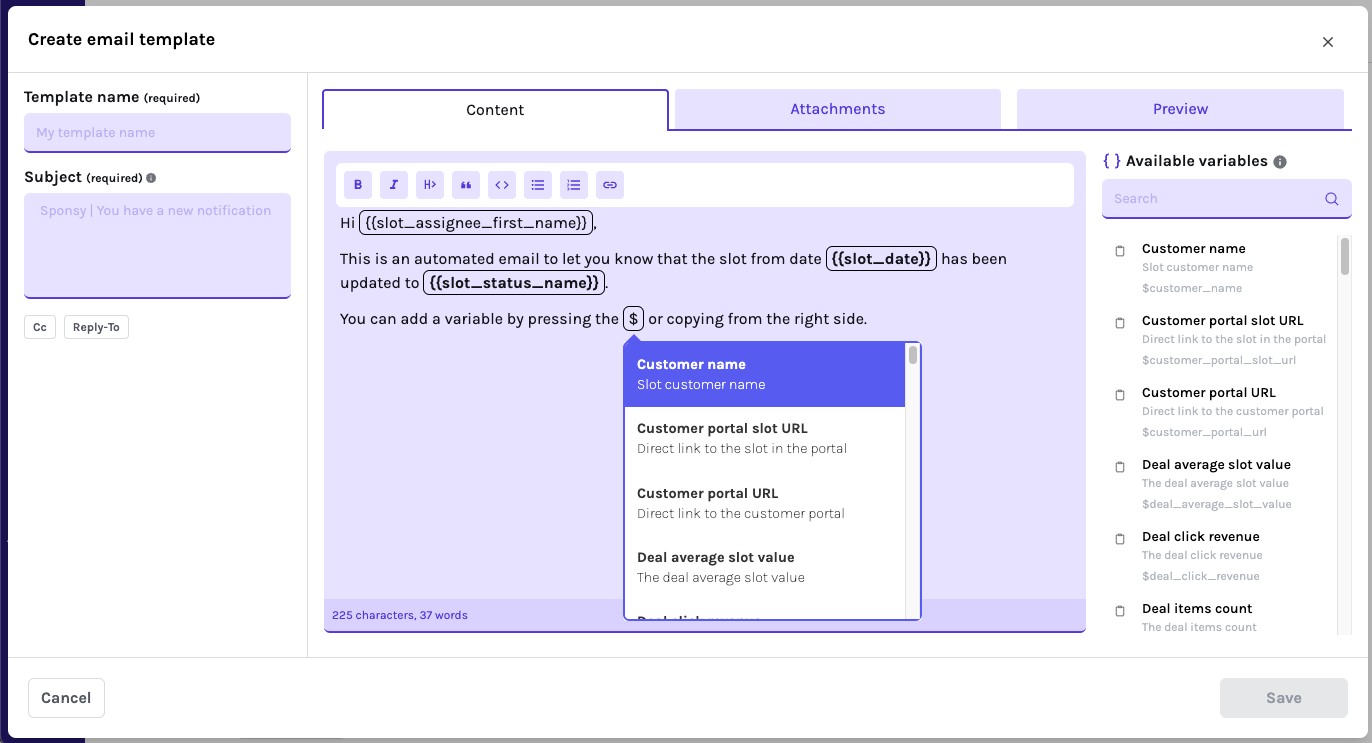
Use the Attachments tab to include attached files and click Preview to see what the email will look like.
When you are ready, press Save.
Templates can be re-used across many actions and automations.
Template variables
Automation templates can use variables to insert live values from Sponsy. Use variables in email templates and Slack messages to avoid copying details by hand.
Available variables include slot details, customer details, deal details, publication details, placement details, custom fields, payment links, portal links, and report links.
Deal custom fields and publication custom fields can be inserted into automation emails and Slack messages. This is useful for internal handoffs, customer reminders, and reports that need customer-specific or publication-specific metadata.
For podcast publications, podcast variables can include episode links and related podcast slot details when those values are available on the slot.
URL variables
URL variables let you keep visible links clean while still adding tracking or context behind the scenes. Use them when you want the link text to stay readable for the recipient while the final URL includes the right campaign, customer, slot, or publication values.
Preview templates before enabling an automation so you can verify that variables resolve as expected.
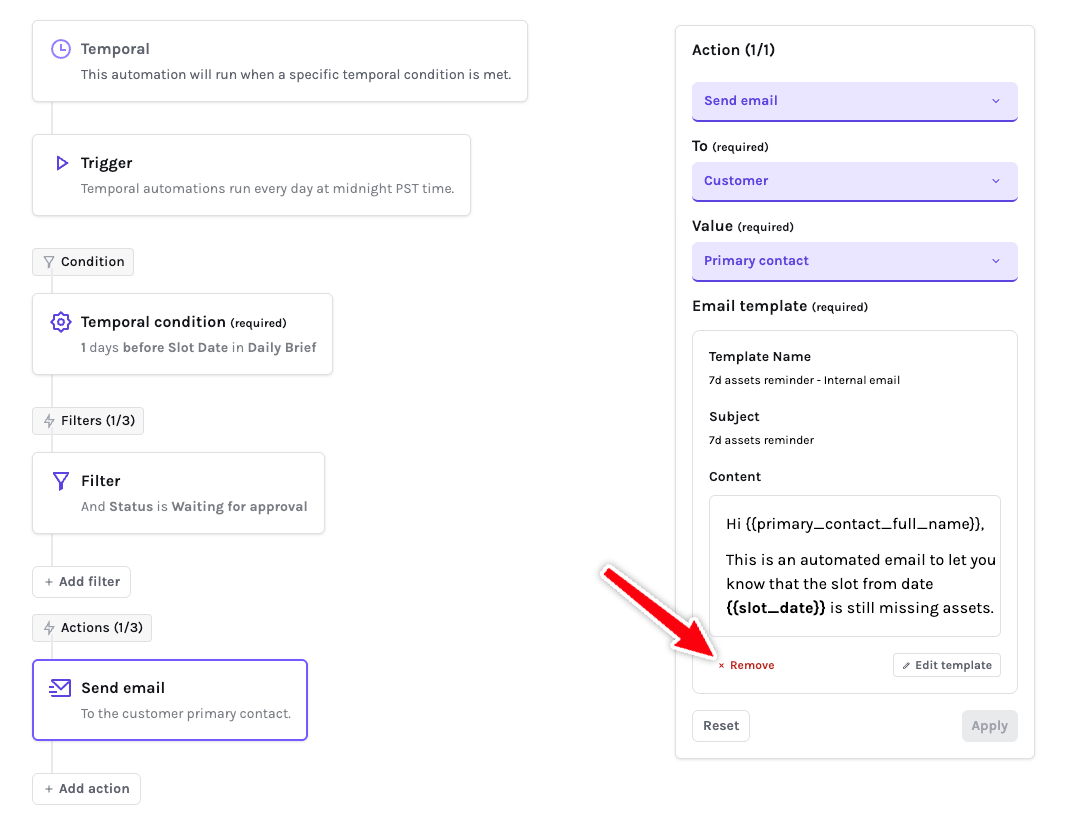
Replacing an email template
When a template is selected for a Send Action, you can replace it by first clicking Remove on the existing template. You will then prompted to create a new template or choose an existing one.
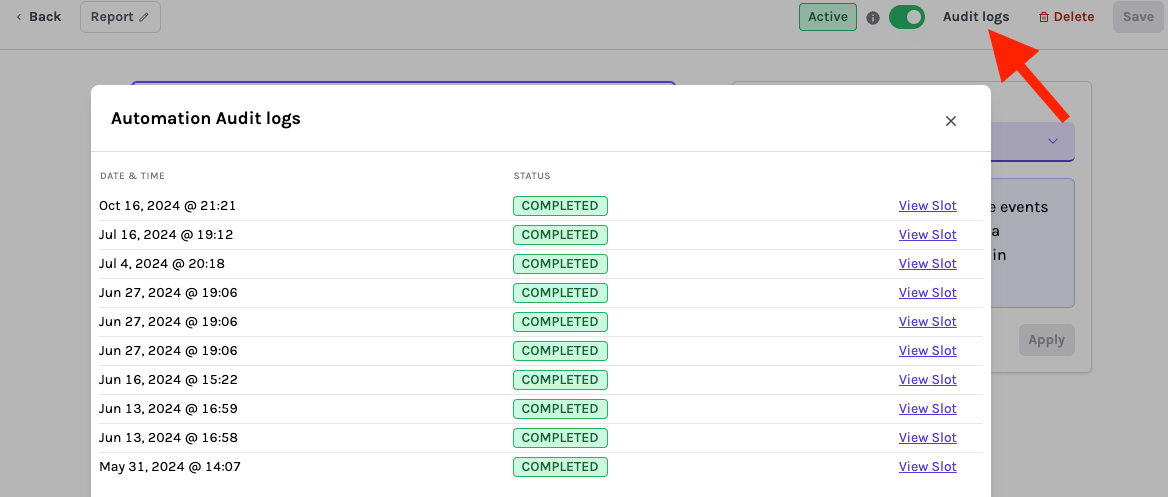
Audit logs
The Audit Logs feature allows you to review the history of your automations. It provides valuable insights into:
- When an automation last ran.
- Whether the automation was successful.
- Which slots triggered the automation.
This feature is especially helpful for debugging and ensuring that your automations are functioning as expected.
For temporal automations, you can rerun a range when you need to backfill missed runs or retry a specific period. Use the missing-only option when you only want Sponsy to run automation instances that did not already complete.
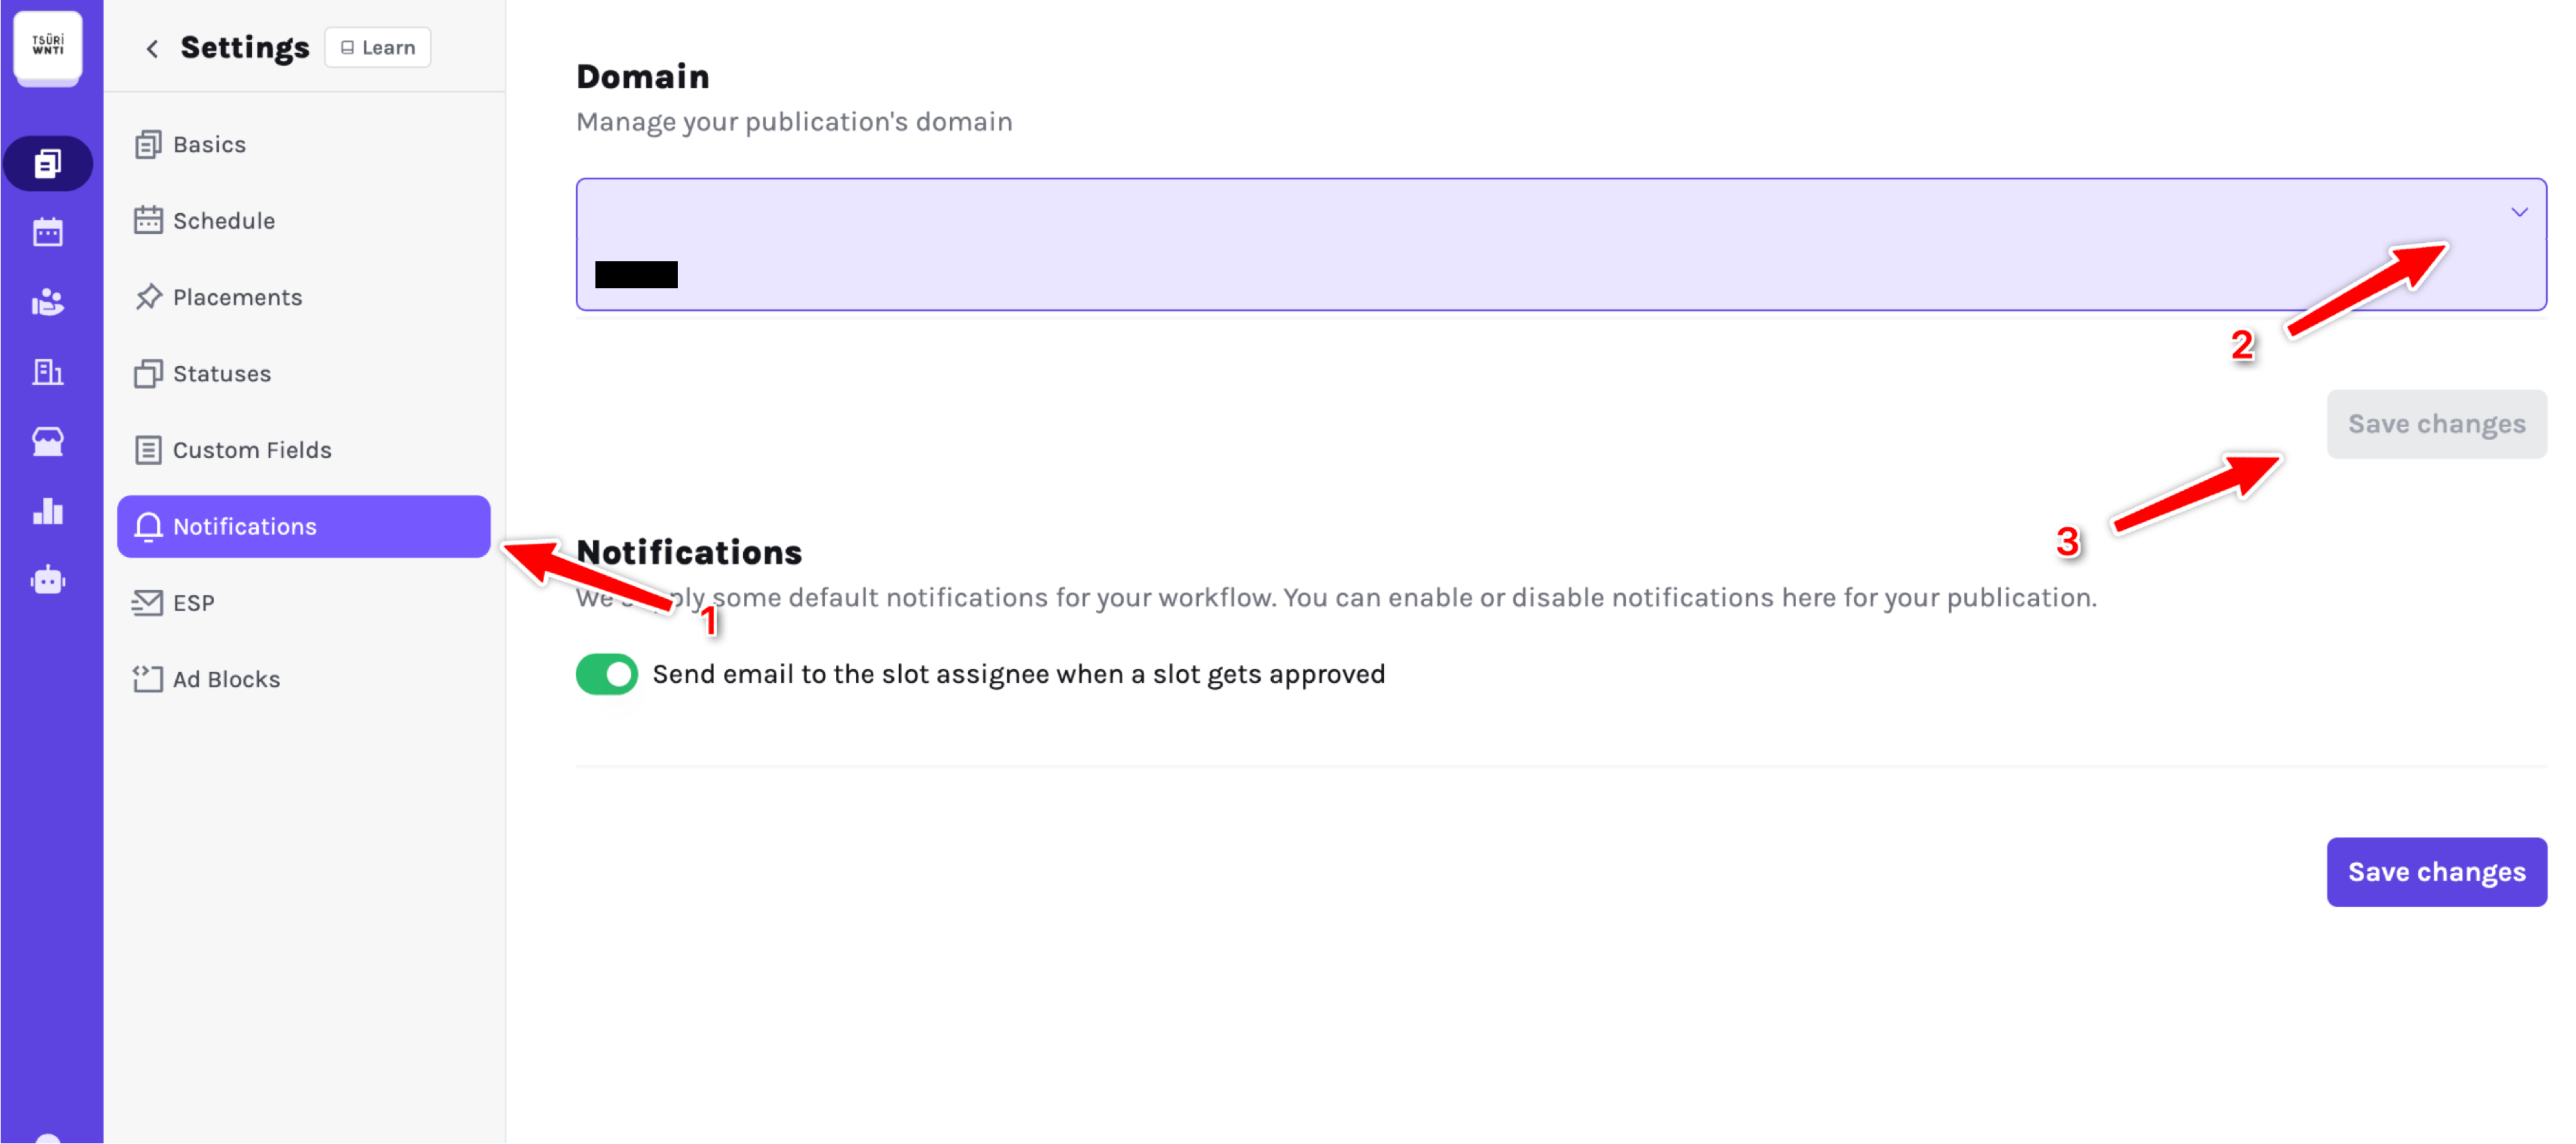
Customize Sending Address for Automations
By default, all your automation emails will be sent from [hi@getsponsy.com](mailto:hi@getsponsy.com). To send emails from your own domain, you can configure a custom domain within Sponsy.
You can set up multiple custom domains and link them to different publications. When an automation runs, Sponsy will use the domain associated with the relevant publication. If no domain is linked, it will default to the first custom domain you configured.
Advanced vs Normal Scheduling in Temporal Automations
Overview
Sponsy offers two distinct scheduling modes for temporal automations: Normal Scheduling and Advanced Scheduling. Understanding the differences between these modes is crucial for setting up effective automation workflows that align with your business needs.
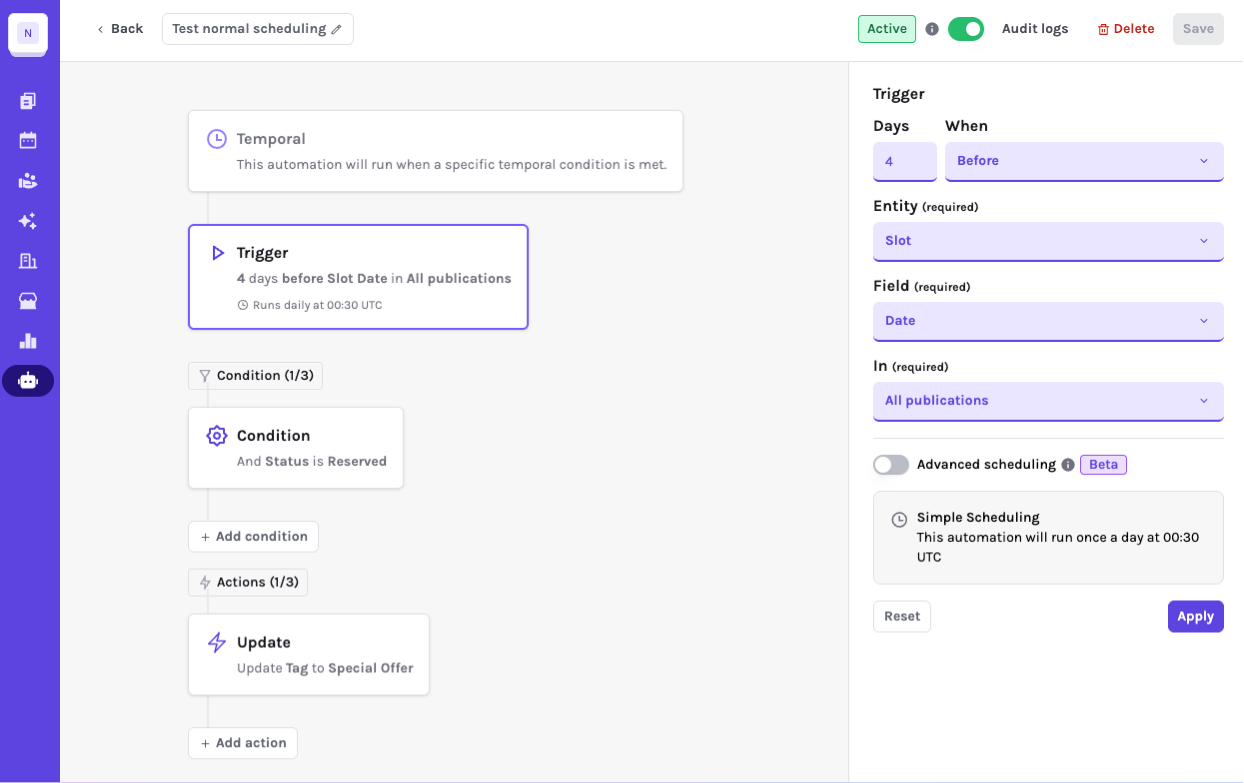
Normal Scheduling (Calendar Days)
Normal scheduling uses standard calendar days to determine when automations should trigger. This is the default mode and works with all days of the week, including weekends.
How Normal Scheduling Works
- Calendar-based calculation: Automations count actual calendar days
- Includes all days: Weekends, and all calendar days are counted
- Simple calculation: If you set "3 days before", it counts exactly 3 calendar days
- No business day restrictions: Automations can run on any day of the week
Example scenarios
Scenario 1: Slot Reminder
- Setting: "2 days before slot date"
- Slot Date: Friday, January 15th
- Trigger Date: Wednesday, January 13th
- Result: Reminder sent on Wednesday (includes weekend days in count)
Scenario 2: Follow-up Email
- Setting: "1 day after slot date"
- Slot Date: Monday, January 10th
- Trigger Date: Tuesday, January 11th
- Result: Follow-up sent on Tuesday
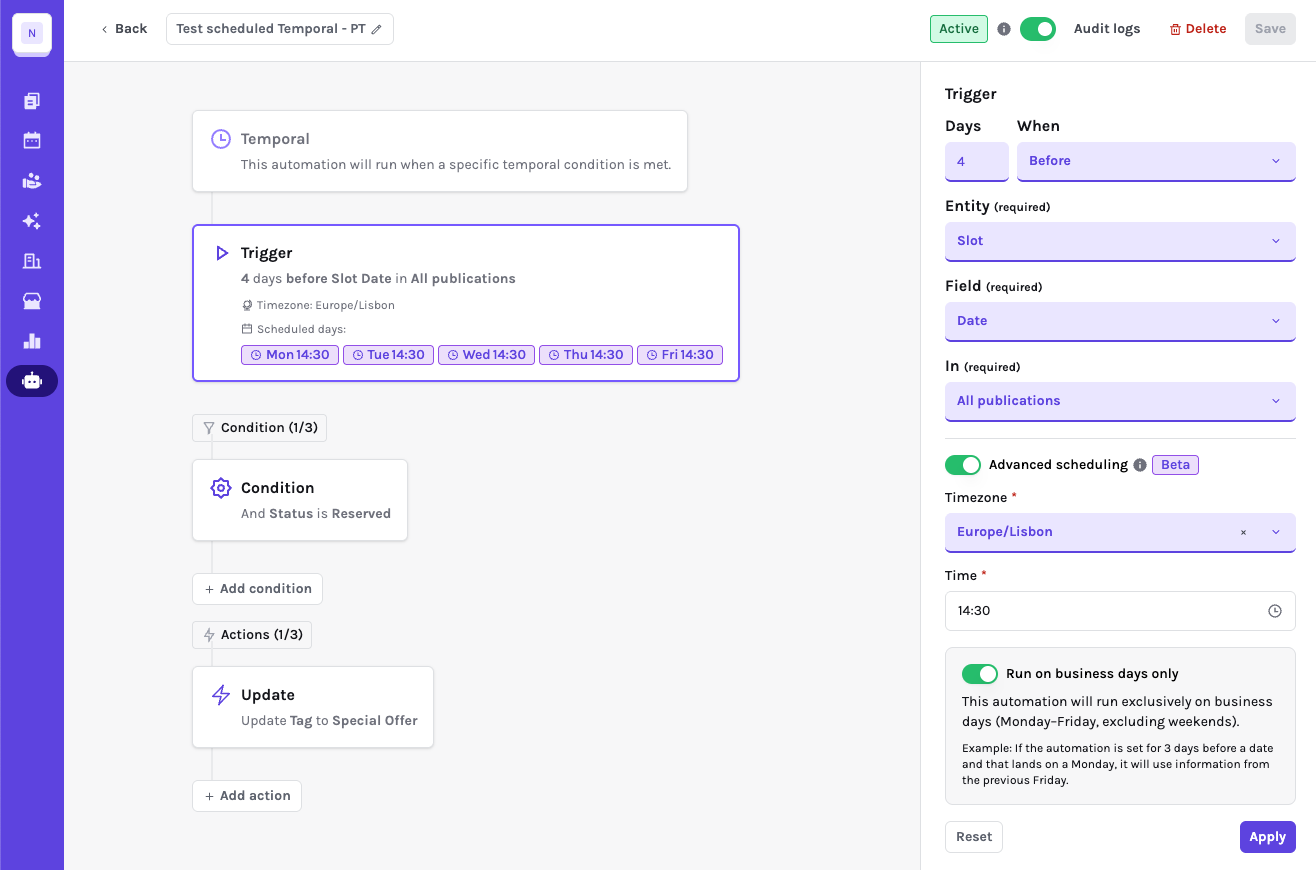
Advanced Scheduling (Business Days)
Advanced scheduling uses business days only, excluding weekends. This mode is ideal for B2B workflows where you only want to process items during working days.
How Advanced Scheduling Works
- Business days only: Excludes weekends from calculations
- Smart day calculation: Automatically skips non-business days
- Professional workflow: Ensures automations only run during business hours
Key features
- Weekend Exclusion: Saturday and Sunday are never counted
- Flexible Time Zones: Supports different time zones for global teams
Example scenarios
Scenario 1: Business Day Reminder
- Setting: "2 business days before slot date"
- Slot Date: Friday, January 15th
- Trigger Date: Wednesday, January 13th (skips weekend)
- Result: Reminder sent on Wednesday
Scenario 2: Post-Event Follow-up
- Setting: "1 business day after slot date"
- Slot Date: Friday, January 10th
- Trigger Date: Monday, January 13th (skips weekend)
- Result: Follow-up sent on Monday
When to Use Each Mode
Use Normal Scheduling When:
- Consumer-facing communications: When your audience expects weekend communications
- Simple workflows: Straightforward day counting is sufficient
- Non-business contexts: Personal events, social media, or consumer products
- 24/7 operations: When your business operates around the clock
Use Advanced Scheduling When:
- B2B workflows: Professional communications that should only happen during business hours
- Client interactions: When you need to respect business hours
- Team coordination: Internal processes that should align with work schedules
- Compliance requirements: When regulations require business-day processing
Tips and Best Practices
- Name your automations clearly: Use descriptive names to differentiate workflows (for example,
Assets Reminder - Newsletter - 7 days). - Test automations: Run test scenarios to ensure triggers and actions perform as expected.
- Before setting actions to your customers, point the email to yourself to see how communication go.
- Leverage templates: Standardize emails for consistent communication.
- Use filters wisely: Avoid over-filtering, which might prevent actions from executing.
Notes and Restrictions
- Automations support up to three filters (in the case of reactive automations) and three actions per workflow.
- Temporal automations run at midnight UTC.