Custom domains
With the **Domains** feature, you can send emails from your own business domain instead of using a generic Sponsy email address.
With the Domains feature, you can send emails from your own business domain instead of using a generic Sponsy email address.
In this guide, we'll walk you through how to set up and verify your domain in Sponsy.
Understanding Domains in Sponsy
When you integrate a custom domain, Sponsy sends emails using your business email address rather than a Sponsy-generated one.
This is particularly beneficial for agencies and media companies managing multiple brands, as it enables customization for different communication streams.
For example, if your media brand "Sports News" wants to send emails from “steve@sportsnews.com” rather than a Sponsy email, you can add "sportsnews.com" as a domain and configure it accordingly.
Adding a New Domain
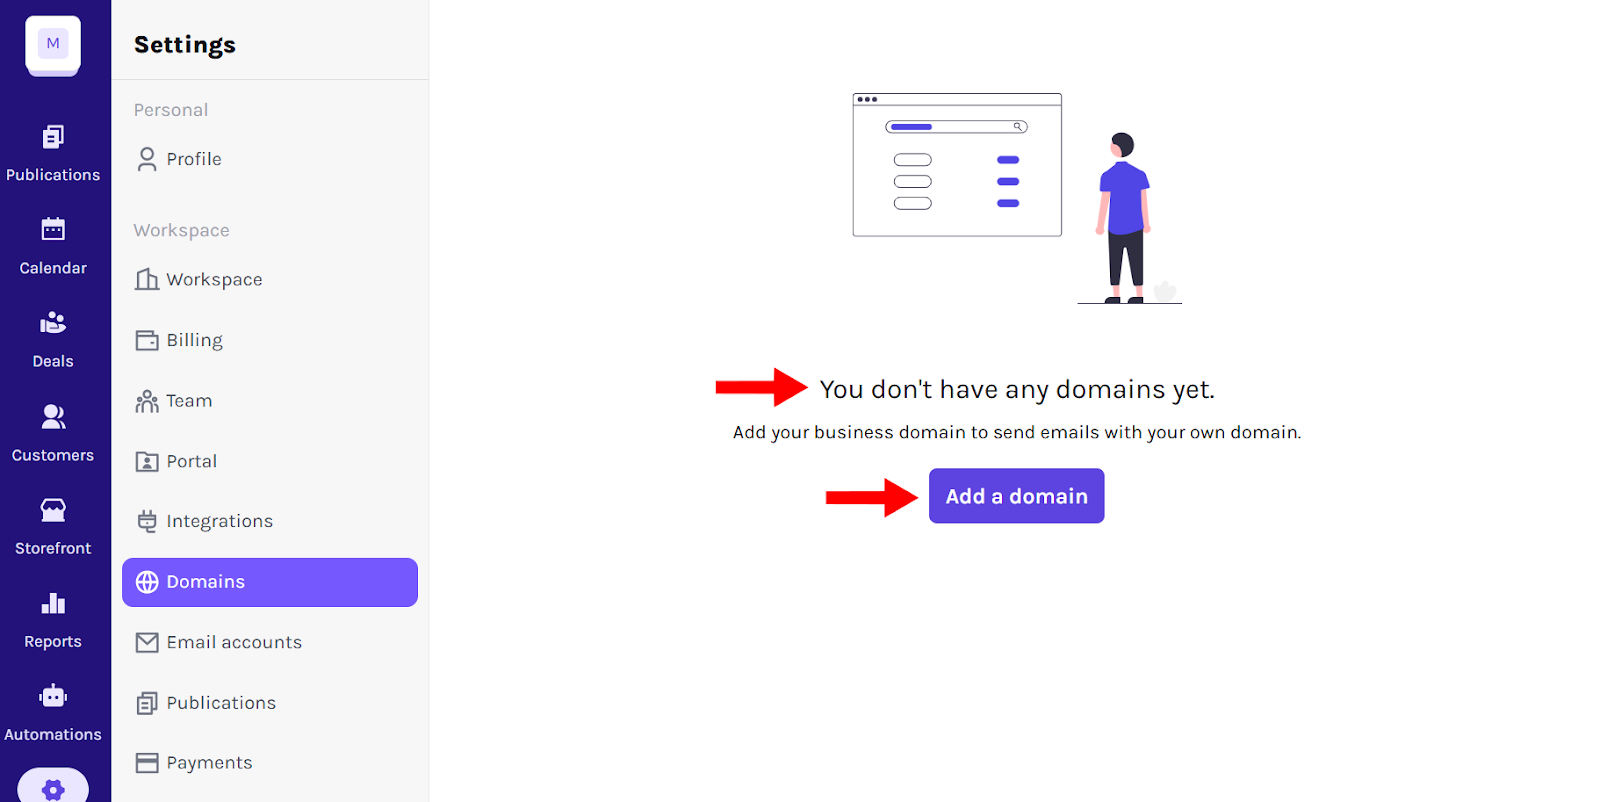
To add a new domain to Sponsy, click the Settings icon in the left sidebar and select Domains from the menu.
On the Domains screen, you'll see a message indicating that no domains are currently set up. Click the Add a Domain button.
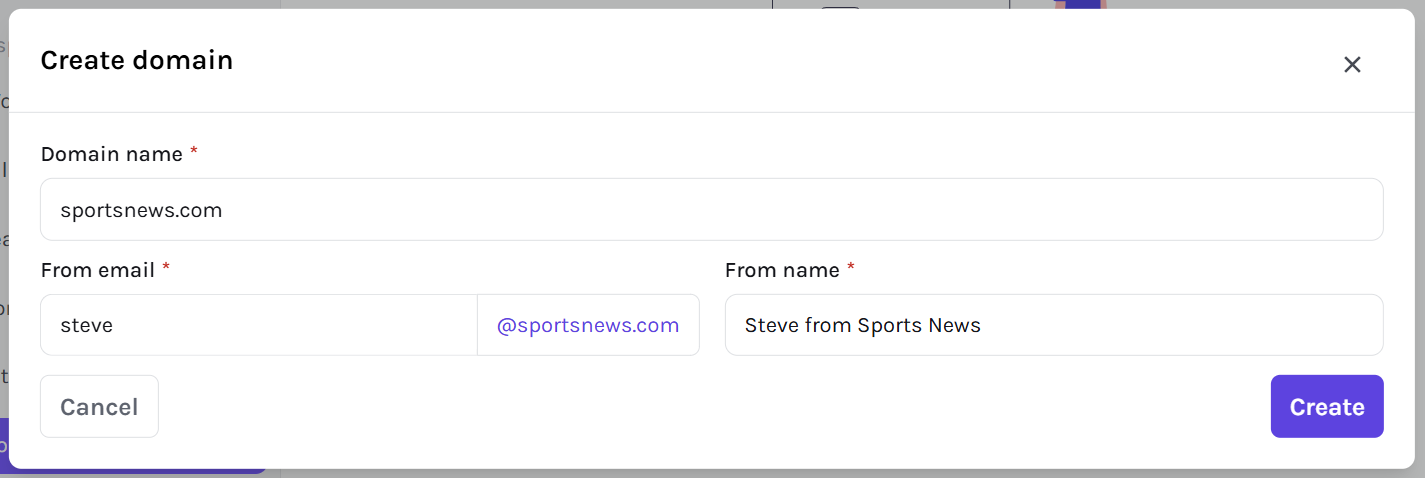
Enter the following details:
- Domain Name: The domain you want to use (e.g., sportsnews.com).
- From Email: The email address that will send communications (e.g., steve@sportsnews.com).
- From Name: The sender's name displayed in outgoing emails (e.g., Steve from Sports News).
Then, click Create to proceed.
Once you create the domain, Sponsy will generate DNS records that you need to configure in your domain provider's settings.
Verifying Your Domain
To verify your domain, you must update your DNS settings with the required records. Here's how:
After adding the domain, you'll see a Domain Verification section with a table displaying the following records:
- Return Path (CNAME record)
- DKIM (TXT record)
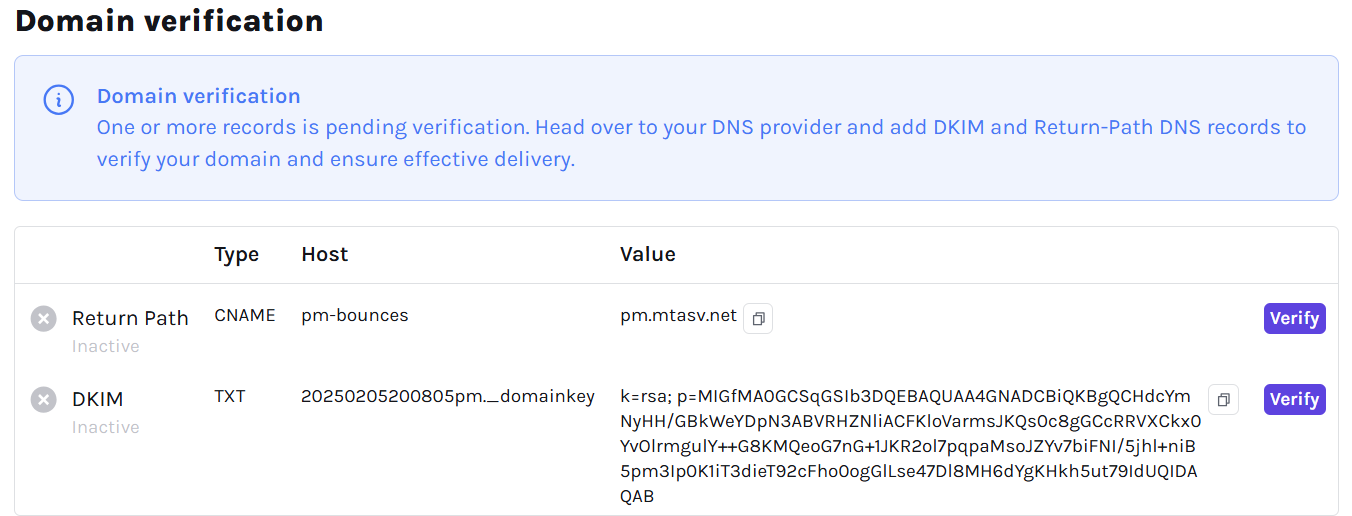
Copy the Type, Host, and Value fields for both records. Then, open your domain provider's DNS management settings (such as GoDaddy, Cloudflare, or Namecheap).
Add the records exactly as shown in Sponsy. Once added, return to Sponsy and click Verify next to each record.

Once verified, your domain is ready to send emails from your chosen email address.
Important: DNS changes can take up to 24-48 hours to propagate. If verification fails, wait and try again later.
Managing Your Domains
After adding a domain, you can view and manage all registered domains. The screen displays:
- Status: Indicates whether the domain is verified.
- Domain: The registered domain name.
For each domain, you can:
- Click Edit to update domain settings or reattempt verification.
- Click Delete to remove the domain if it's no longer needed.
You can also use the New Domain button at the top right to add additional domains.

Next Steps
Once your domain is verified, you can configure publication notifications in Sponsy. This allows you to assign specific domains to different types of communications. To do this:
- Select the appropriate domain for that publication.
Now that you know how to set up custom domains, try adding your own!