Team Management
The **Team Management** feature makes it easy to collaborate with your colleagues while keeping control over who can access different parts of your workspace.
The Team Management feature makes it easy to collaborate with your colleagues while keeping control over who can access different parts of your workspace.
With Team Management, you can:
- Invite new team members and assign them roles.
- Control what each team member can see and do.
- Edit team information and permissions.
Let's explore how you can manage your team.
Team Management Overview
To access Team Management, click the Settings icon on the left sidebar and select Team from the menu.
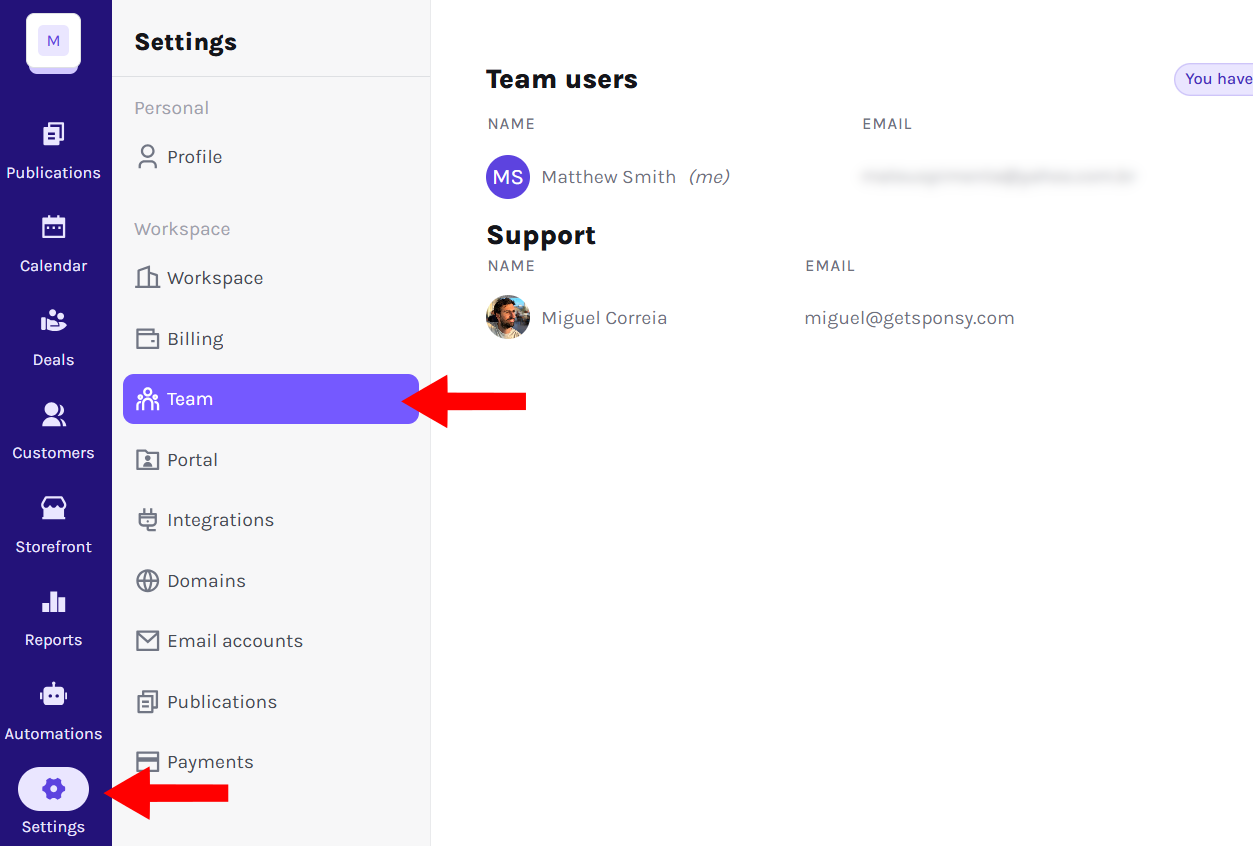
Here, you'll see a list of all current team members, along with their email addresses and assigned roles. Each team member has two management options: Edit and Permissions. Additionally, a Support Area displays contact details for a Sponsy representative in case you need assistance.
Team Members List
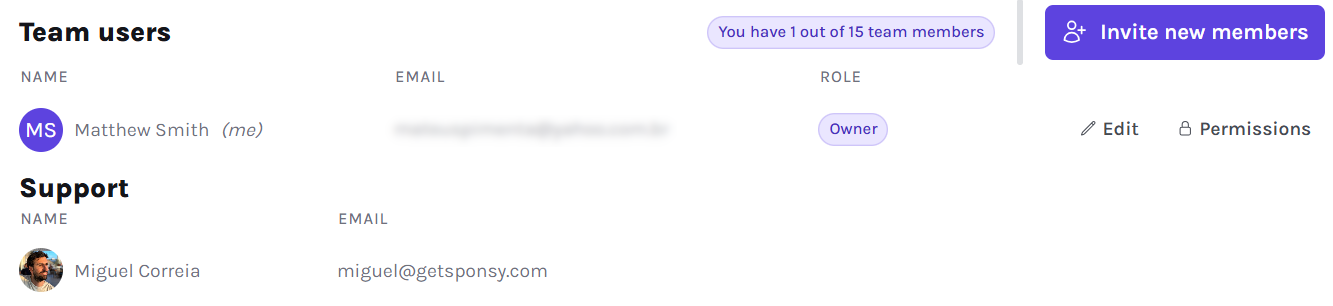
The team list gives you a quick overview of who is part of your Sponsy workspace. Each entry includes:
- Name
- Email address
- Role (Owner, Administrator, Collaborator, or Guest)
This view helps you identify team roles at a glance and make necessary adjustments easily.
Inviting New Members
Need to bring someone new on board? Sponsy makes this simple.
Click Invite New Members at the top right of the screen.
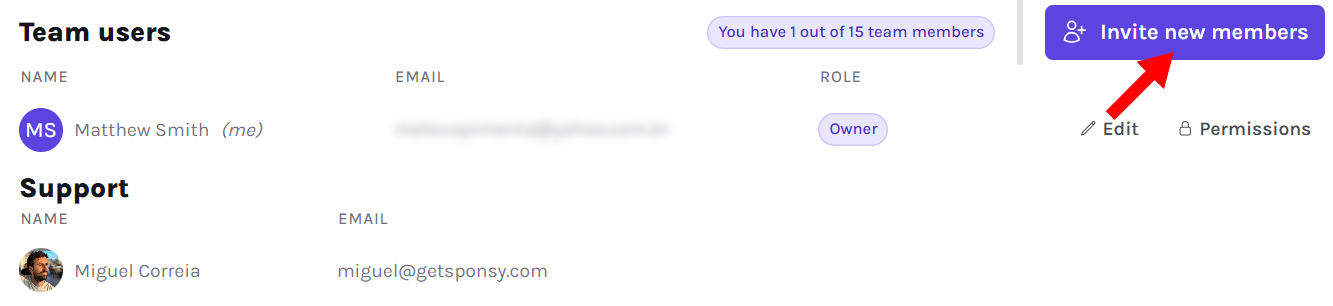
Enter the email addresses of the new team members. You can add multiple emails by clicking New Email.
Assign a role to each invitee:
Owner: Has full access to Sponsy, including the ability to add or remove team members.Administrator: Can manage most aspects of Sponsy but may have some workspace limitations.Collaborator: Can contribute content and access most features but cannot make administrative changes.Guest: Has read-only access.
To finish, click Send Invitations.
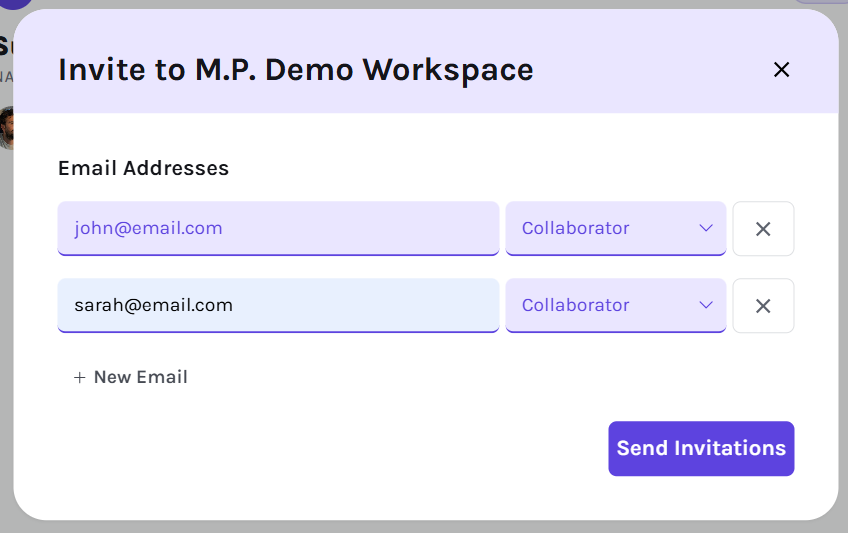
Example: Sarah, your new campaign manager, needs access to Sponsy. You enter her email, assign her the Collaborator role, and send the invite. She will receive an email prompting her to join Sponsy. If she doesn't accept within a few days, you'll need to resend the invitation.
Editing Team Members
If a team member's role or details change, you can update their profile with ease.
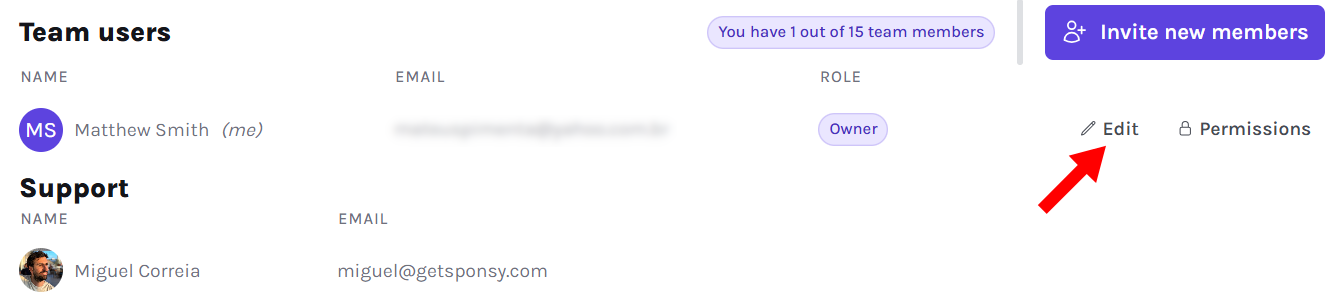
Click Edit next to the team member's name.
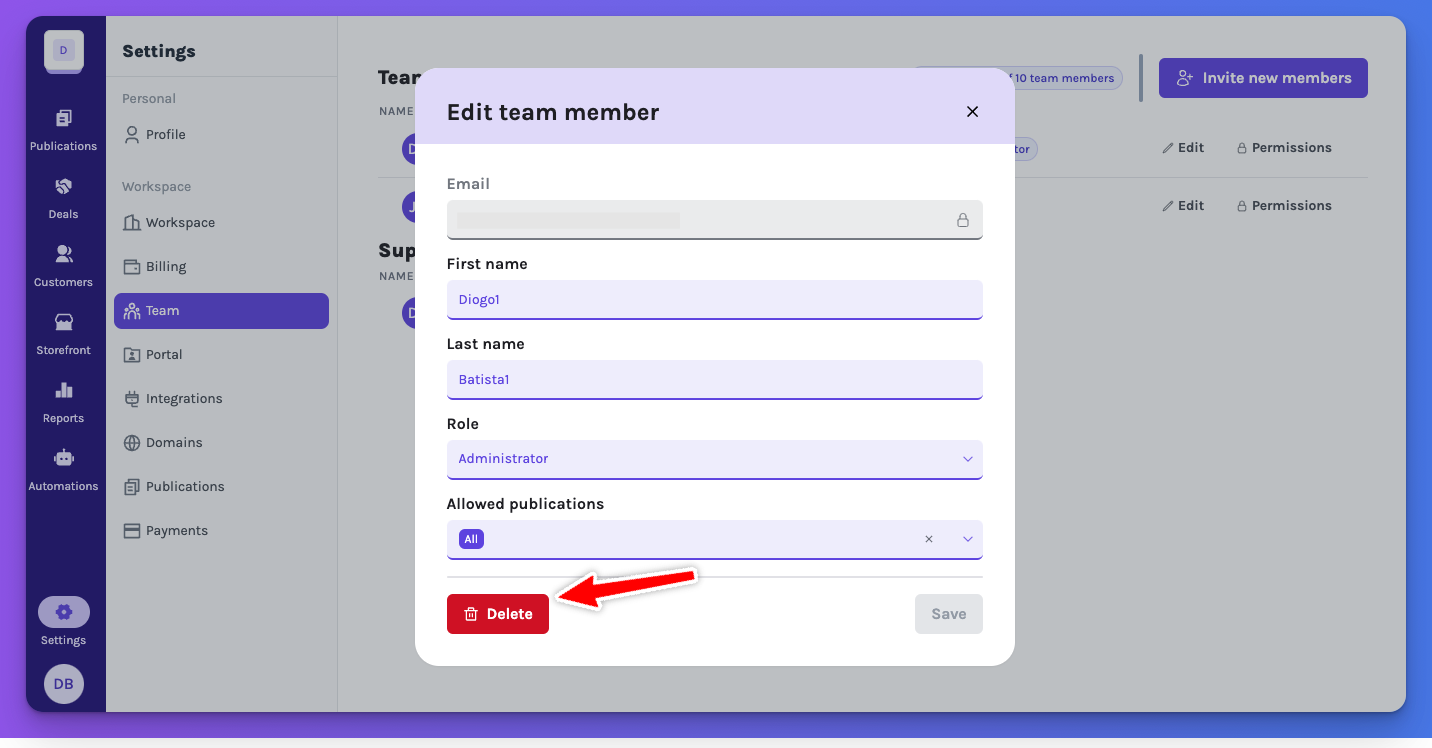
Update their email, first name, or last name as needed. Also, adjust their role if responsibilities have changed and define which publications they can access. Then, click Save to apply the changes, or Delete to remove the team member from Sponsy.
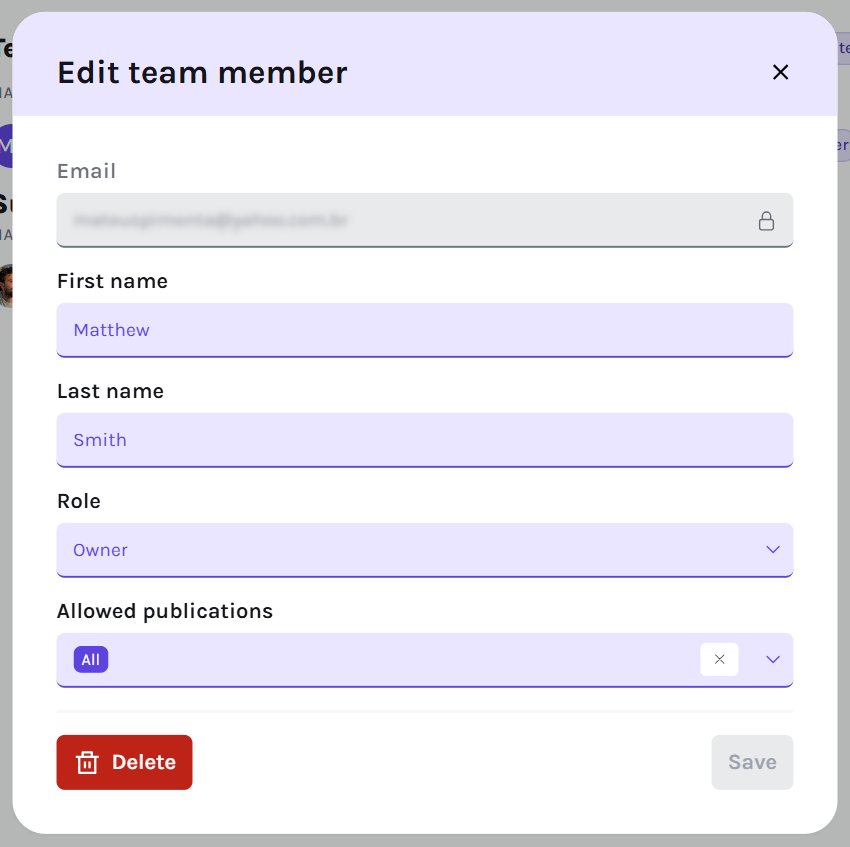
Example: John was originally a Guest but now needs to contribute to a sponsorship proposal. You edit his profile, changing his role to Collaborator and granting him access to specific publications. Now, he can actively participate in the project.
Only workspace Owners can delete members. If you don’t see the button, you likely don’t have the necessary permissions.
Editing Team Member Permissions
For advanced control over team actions, you can adjust individual permissions.
Click Permissions next to a team member's name.
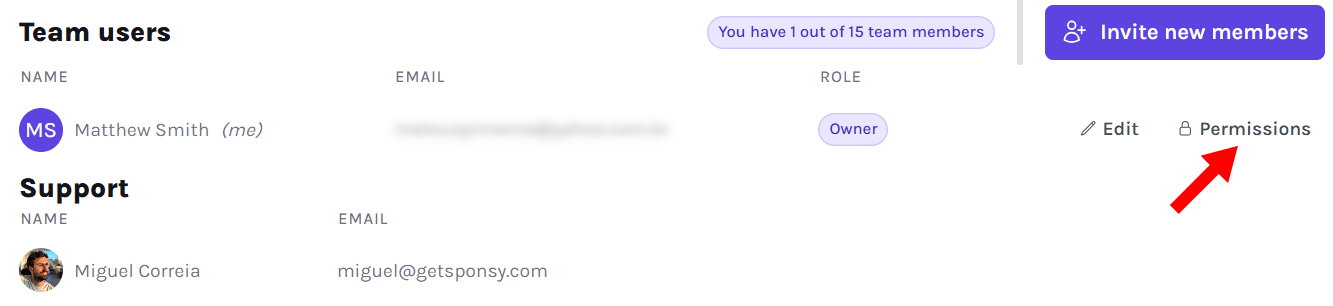
Turn specific actions on or off. Then, click Save to confirm changes, or Cancel to discard them.
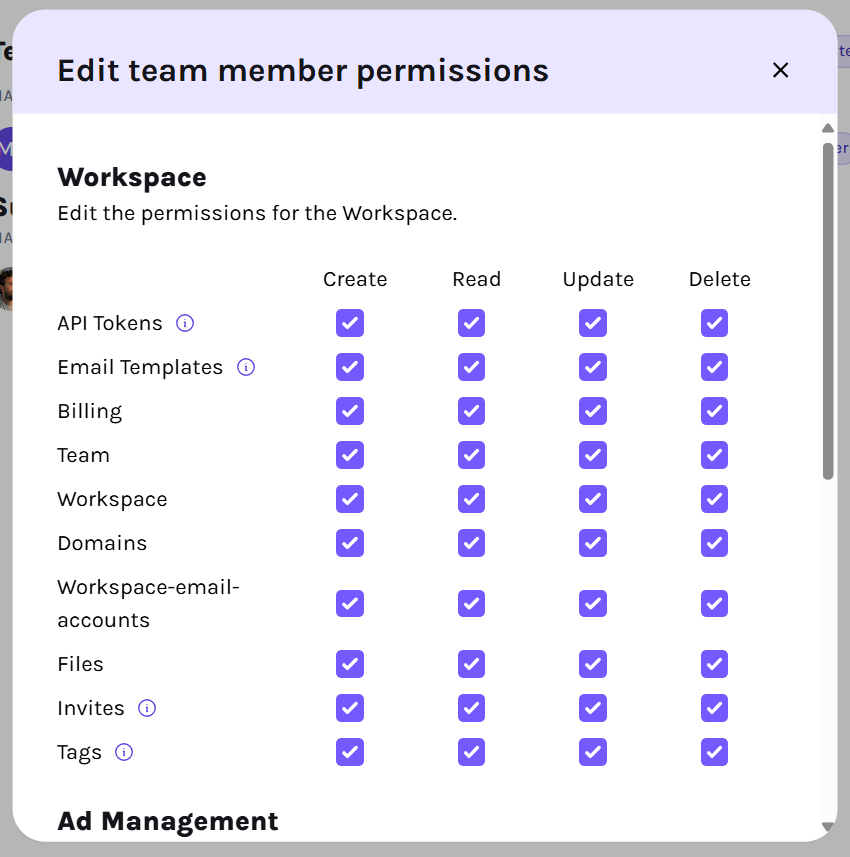
This level of customization helps ensure each team member has the appropriate level of control within Sponsy.
Financial visibility
Financial visibility is controlled separately from a teammate's base role. This lets you give someone operational access without exposing pricing or revenue data.
When financial visibility is hidden for a teammate, they can still work with operational data such as booked slots, customer names, contacts, ad copy, schedules, comments, and day-to-day workflow details. Sponsy hides financial values such as prices, deal values, revenue, and financial reports.
Use this permission for contractors, external collaborators, campaign managers, or team members who need to help execute campaigns but should not see commercial terms.
Tips and Best Practices
- Regularly review team roles and permissions: As your team evolves, some members may need more (or less) access. Periodically check and adjust roles.
- Use the Guest role strategically: If an external stakeholder needs temporary access, assign them a Guest role instead of a full-fledged team membership.
- Encourage acceptance of invitations: Team members need to accept their invitation within a few days. If they forget, you'll have to resend it.
Notes and Restrictions
- Only Owners can invite or remove team members.
- Invitations expire if not accepted within a few days.
- Guests have read-only access and cannot make any modifications.
- Financial visibility can be restricted per teammate without changing the teammate's base role.
Delete a user
To remove or edit a user in Sponsy you have to go to https://getsponsy.com/settings/team and click on the "Edit" button in the user in question.

A modal should appear and you should be able to delete the user via the button on the left hand side.
Note that only the Owners of the workspace can do this action, so if the button does not show to you it is because you do not have the right permissions to do so.